
Select & customize your webpage
Pick your industry, choose one of seven ready-made styles, then make it yours and publish. Part of Retail PLUS.
Templates are part of Retail PLUS, which includes your webstore. Click Webstore in ASP's sidebar, then the Templates tab.
1. Pick your industry
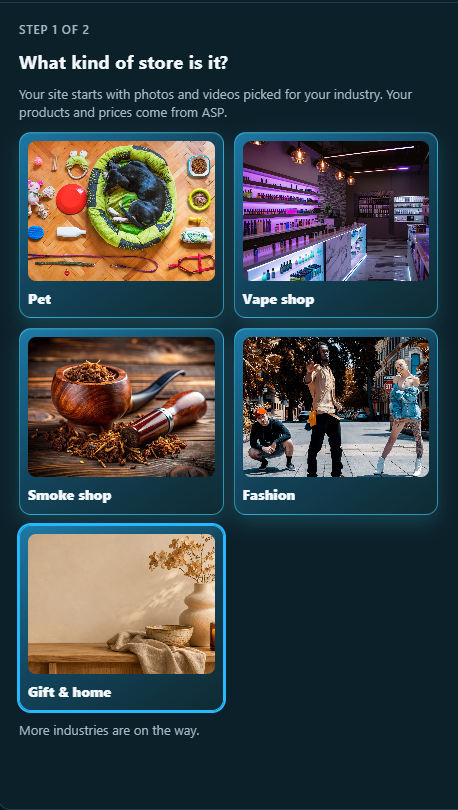
Your website starts with an industry pack: a set of professional photos and videos picked for your kind of store. Your products, prices and stock always come from ASP, so the site is never out of date.
- Under What kind of store is it?, click your industry.
- Changed your mind later? Click change industry above the styles. A new pack only changes your draft, never your live site.
2. Choose a style
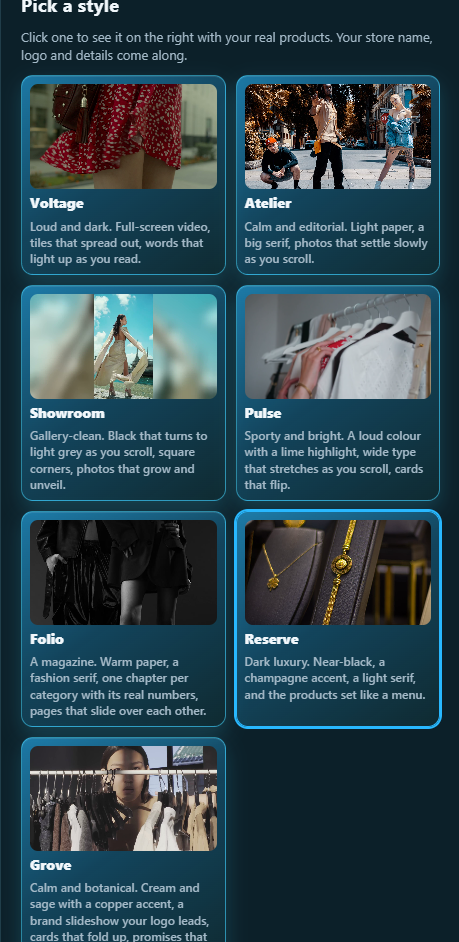
Pick from seven unique, premium-looking styles, each one already designed and filled in for you. Click one and the preview on the right shows it with your real products, your store name and your industry's photos. Scroll the preview to see the whole page.
- Voltage: loud and dark, with full-screen video.
- Atelier: calm and editorial, light paper and a big serif.
- Showroom: gallery-clean, black that turns to light grey as you scroll.
- Pulse: sporty and bright, with cards that flip.
- Folio: a magazine, one chapter per category.
- Reserve: dark luxury, the products set like a menu.
- Grove: calm and botanical, cream and sage.
Try as many as you like. Nothing goes live until you click Publish.
3. Customize your webpage
- Click Customize. Click any words on the preview, type your own, then click Apply. Use the starter words puts the style's words back.
- Under Brand, set your Store name and Brand colour. Pick a colour or type its code, like #3f6b55.
- To change a photo or video, click it on the preview, or under Photos and videos. Pick another from your industry pack, then click Apply.
- To use your own photo, click + Upload a photo in the same window (PNG, JPEG or WebP, up to 5 MB), then Apply. ASP keeps up to 30 of your photos to reuse.
- Under Sections, untick any part of the page you don't want.
- Click Store details and add your address, hours and phone. They show in the footer and visit section, in every style. Click Done.
- Click Phone above the preview to see how it looks on a phone, and Desktop to go back.
4. Publish
Your changes save as a draft by themselves. When it looks right, click Publish. Your site goes live, and the top of Templates says Live since the date and time. Change anything later and publish again.